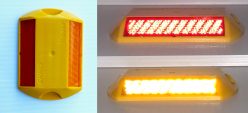
Raised pavement markers are used all over the world to provide safety and direction to drivers that can be both seen and felt day and night. When it comes to installation, the number one goal is that the marker stay in place. To accomplish this goal, proper installation methods should be followed. The method you use will depend on how much traffic will be going over the markers, the type and condition of the pavement, and whether the application will be permanent or temporary.
Temporary or Low Traffic Applications (Butyl Pads)
 Quite often, raised pavement markers are placed in areas that will receive either very low traffic or standard traffic for a short period of time. For example, in construction areas, markers will be put down and then later pulled back up. For applications like shopping cart return areas, traffic seldom affects the markers. Blue markers, placed out of the flow of traffic are also not subject to heavy traffic.
In situations like these, a simple application method using double sided butyl pads can be used to apply the markers. Butyl is basically a sticky tar pad protected on both sides by removable wax paper. Butyl pads stay soft and pliable throughout their life thus making it possible to pry a marker off of the pad if necessary. The advantage of butyl pads is a quick application. A marker can be applied in just seconds using the peel and stick butyl pads. To apply markers using a butyl pad you simply peel the paper off of one side, press the pad into the road, peel the paper off the top and then press the marker into the butyl. Longevity depends entirely on traffic.
Melt Down or Torch Down Thermoplastic Pads
 For more permanent applications a thermoplastic pad can be used. Thermoplastic is a meltable material that becomes liquid when heated to about 300 degrees. It forms a bond with both the road surface and the road marker. The thermoplastic pads that we sell are sanded on one side so that they do not stick to each other when shipped. To apply markers using the thermoplastic pads simply brush off any loose sand from the pad, heat the pavement to about 300 degrees, lay the pad on the hot surface sanded side down and continue to heat until the pad is molten. Then just lay your marker in the center of the pad and press gently. The thermoplastic will cool quickly and form a bond with the road and marker. At this point the marker is ready for traffic.
Hot Tar (Bitumen)
 A common method of apply markers in quantity is to use hot tar or bitumen. This is done by melting a block of bitumen or tar in a melter and then dispensing some onto the pavement and placing a marker in the hot tar until it cools. This method is often used when large numbers of markers need to be applied at one time. The melter is mobile and the installer simply pours the tar onto the surface, lays down a marker and goes on to the next one. The results using this method will be similar to using a melt down thermoplastic pad only quicker.
Epoxy (two part)
 Epoxy is a very effective way of applying the markers to asphalt or cement. Epoxy is one of the few materials that will effectively bond to cement. There is more labor involved with using epoxy since the two parts must first be mixed. Also, after being mixed you have about 15 minutes to use the batch before it hardens. This creates a challenge to the installer. Also, traffic must be kept of the markers until the epoxy has properly cured.


